How to install haproxy as a reverse proxy
How to install haproxy as a reverse proxy
This article was actually scheduled for some time now, I don’t really know why I left it in my draft here for so much time. I finally got the time to test and install haproxy as a reverse proxy server in front of apache web server. Install was a bit different of what I remember, maybe because I manly tested / installed it on a Centos / Redhat operating system and haproxy was still in the repository. But lets get started, right?
Install haproxy server
Install was a bit different as I said before, so will go with first on Centos / Redhad and then with Debian / Ubuntu.
- Centos / Redhat
To install haproxy on this distribution appears to be easy, just using the yum installer to install the package.
|
1 |
yum install haproxy |
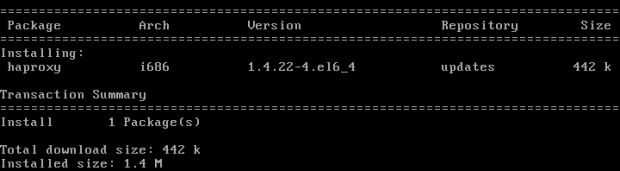
haproxy install on centos
- Debian / Ubuntu
Currently I’m using Debian Wheezy so it did not had it in its repository haproxy by default. You can of course go around it and use the backport repository but I don’t want to. For those working with Squeeze they can still use:
|
1 |
apt-get install haproxy |
For those like me, we will manually download the package from the official website and compile the package.
|
1 2 3 4 5 |
wget http://haproxy.1wt.eu/download/1.4/src/haproxy-1.4.24.tar.gz tar -xvf haproxy-1.4.24.tar.gz cd haproxy-1.4.24/ uname -a make TARGET=linux32 |
You need to be careful here, the target is actually the linux kernel version number, for instance, for me is:
|
1 2 |
:~# uname -a Linux d1 3.2.0-4-486 #1 Debian 3.2.41-2 i686 GNU/Linux |
So I’m using 32 due to version 3.2.41-2.
Make sure you are using the correct one. Then just copy haproxy to /usr/sbin/
|
1 2 |
cp haproxy /usr/sbin/ chmod +x /usr/sbin/haproxy |
Reverse proxy configuration using haproxy
For this you just need to create a configuration file wherever you want, in my case I created one in:
/etc/haproxy_yourhowto.cfg
Then you add the below content making sure you update it with your own values:
|
1 2 3 4 5 6 7 8 9 10 11 12 13 14 15 16 17 18 19 20 |
global daemon maxconn 256 defaults mode http timeout connect 5000ms timeout client 50000ms timeout server 50000ms frontend http-in bind 192.168.1.104:80 default_backend backend_servers backend backend_servers server sv1 127.0.0.1:80 maxconn 32 listen admin bind 192.168.1.104:8080 stats enable |
I’ll try to explain just a bit …
The very first section, “global”, we tell haproxy that we want a maximum number of 256 clients connecting at the same time as well as “it” running as a daemon. Without the daemon option it will output to your console everything it does.
The second section we just set some timeouts, since we normally want, as a reverse proxy, to keep connections alive, and also stating the mode to “http”.
The next two sections are the actual frontend and backend settings, first we set the frontend settings, the IP address we want haproxy to listen, and then we state that we want it to pass requests to our default backend servers.
Now I could have used directly the backend server and be done with it, but as a reverse proxy, as well as a load balancing server, it is best to specify the backend servers into a different section. Me, however, only set one backend server as I’m only testing this locally, but if you have another server, you can add it like so:
|
1 2 3 |
backend backend_servers server sv1 127.0.0.1:80 maxconn 32 server sv2 127.0.0.2:80 maxconn 32 |
This way you can load balance requests between two different backend servers.
Last section is mainly for admin purposes.
Well that’s it for installing and setting haproxy as a reverse proxy as well as a little load balancer. The configuration can still be tweaked of course, this is just a sample of a quick working setup. From here you can optimize it for your needs.
By the way, I was really impressed by the big guys using this load balancing software, take a look at this list:
http://haproxy.1wt.eu/they-use-it.html
Big websites like Discus, Stack Overflow / Server Faults, Fedora, Reddit and many more have used it, if not still use it, as load balancing product with great results. Haproxy really is a great software.
I’ll end the article here, if I missed something, please comment bellow, is well over 2 AM here when I’m writing this article so I may have missed things. Until next time!


